
I’ve never been to Tuscany but one day I hope to visit. Until then, I have to satisfy myself with images from the film Under the Tuscan Sun, my Italian cookbooks, the stories I vicariously collect from friends and relatives, and their photos that make me swoon.
The closest I’ve come to Italy was living next to our Italian neighbors in the Bronx. Roasting red peppers would send their rich aroma across Josie’s front porch over to ours during the long hot and humid summers. Josie lived next door with her husband Charlie, kids Eddy, Joey and Ann-Marie. Their Uncle Frank, lived in the apartment downstairs. His perennial summer outfit was white sleeveless undershirt, pants and belt. Until I get to Tuscany, that’s my Italian memory.
***
Thanks to my generous friend Jason, who dropped off a load of cherry tomatoes that still smell like sunshine, I offer up this salad.


I had a piece of leftover baguette in the freezer. I love Persian cucumbers and always have them around. Maybe Persian cucumbers aren’t the most authentic to use in a Tuscan salad but I used a little creative license. The basil came from my herb pot outside. The leaves are a tad pale, probably needed to move it into more sun, but the basil still has that terrific flavor.

My Novio eats just about everything. One of the very few things on this planet he doesn’t like are croutons. In a bread salad, the bread is generally not toasted or baked so that the chunks can soak up the delicious juices from the tomato, mixed with olive oil and balsamic vinegar. This salad is a breeze to assemble. I don’t make the dressing separately, I just keep layering.

Chunks of cucumbers are cut similar to the bread.

Some fresh garlic, sliced red onion, chives and basil are added.

 Dreamy Good
TUSCAN TOMATO AND BREAD SALAD
Ingredients: 4 oz. (100 g.) piece of Italian or French bread, stale 2 dozen cherry tomatoes, cut lengthwise 2 Persian cucumbers, sliced in half lengthwise and cut thickly 1/4 medium red onion, thinly sliced 1 clove garlic, minced 1 T. chives, chopped 2 T. fresh basil 1/4 c. good olive oil 2 T. balsamic vinegar sea salt freshly ground black pepper More optional ingredient ideas: 1/4 c. black olives 1 c. garbanzo beans, drained 4 oz. goat cheese, crumbled OR 4 oz. Parmesan/Asiago cheese, shavedDirections:
Cut bread into bite-sized chunks and place in medium salad bowl. Add halved cherry tomatoes, minced garlic and red onion. Add olive oil, balsamic vinegar, salt and pepper and toss to coat the bread well. Add cucumbers and chives and basil. If adding olives and/or garbanzo beans, place them in the bowl. Toss lightly. Let sit for about 20 minutes for flavors to blend. If adding cheese, place in salad just before serving.
Serves 4

A bit of Tuscany wafting into your home
What more appropriate way to celebrate my 100th post (I can’t quite believe it) than with cake!
I don’t do cakes like this too often. Probably because it would be a dangerous thing.
And I’m not big on humdrum frosting (like someone I know). I only like it when it’s made with high-quality ingredients and isn’t overly sweet. Now that I think of it, and this is insane, but my mom would sometimes make me buttercream frosting on a rare Sunday when I was little and in dire need of a treat. She’d then offer it to me sans cake! Of course, in my humble opinion, it was THE best buttercream in the world. Apparently, I ate it all without hesitation. No wonder I only like the high-quality stuff now. She schooled me on the difference early on.
My dad (who would have turned 100 this year) was particularly finicky about frosting and didn’t care for most of them. Whenever he was presented with a large piece of (two or three) layer cake, he would slowly begin working away at it. After some time, he’d pass the plate over to my mom. “Here, Gerta,” he’d say casually. My mom glanced at the cake innocently lying on its side. “You don’t want any of it?” He’d shrug. She’d take it and turn it towards her. “Shtinker, you ate the whole inside and just left me the frosting!” He had done a precise excavation of the cake, leaving a perfect shell of the unwanted frosting behind. I can’t tell you how many times I witnessed this. My mom always took the cake and he always gave a little chuckle in response. A sly one, my dad. No wonder his favorite dance was the Fox Trot.
∞
When my Novio’s birthday approached, he stated firmly that he didn’t want to have a big celebration and was decidedly un-decisive about what he wanted. Then it came to me in a flash. “Let’s have a big jam session!” Novio’s soul is all about music – early rock to be exact. He can never pass up a chance to sing and play keyboard. His eyes lit up. “That’s a great idea!” he exclaimed. Plus, there were a couple of other birthdays and Novio was only too happy to share in the celebration.
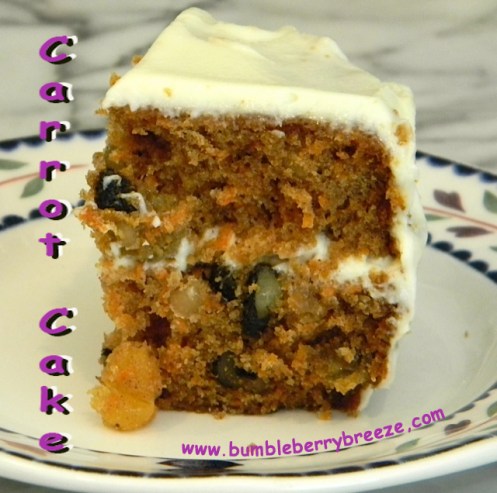
So it was time to think cake. The choice was obvious. Carrot Cake.
And not just any carrot cake but one that’s light, moist and amazingly delicious. Thank you, Ina Garten, for the original inspiration. With a little tinkering, I had a version that was just the ticket. Both my Novio and I adore carrot cake and when it’s this one, we’re in heaven.
Begin with finely shredded carrots. You can use the food processor, but a box grater gives you a moister product and it’s only a few carrots…
 dry ingredients…
 fun stuff…

 Great for cupcakes or as a cake. Mini-cupcakes are terrific for a crowd.


Here is the cake of choice for Novio’s big party/jam session – served as one 9″ 2-layer cake, one small cake and a whole lot of mini-cupcakes. I used a delicate touch with the frosting throughout and left several mini-cupcakes sans frosting.

 Daddy would definitely have eaten up this frosting.
CARROT CAKE
adapted from Ina Garten’s, Barefoot Contessa Parties!
Ingredients:
1 c. (220 g.) sugar (I use Baker’s sugar AKA superfine sugar) 1 1/4 c. (300 ml.) canola or safflower oil 4 eggs 1 t. pure vanilla extract 2 c. (450 g.) all-purpose flour plus 1 T. flour ( or 1 1/2 c. flour and 1/2 c. whole-wheat pastry flour) 2 t. cinnamon 1 t. ground ginger 1/4 t. ground nutmeg 2 t. baking soda 1 t. salt 3 large carrots (1 lb.) , finely shredded, excess liquid squeezed out 1/2 c. (120 g.) raisins 1 c. (240 g.) walnuts, chopped (if no nut allergies are around) Frosting: 8 oz. (240 g.) Neufchatel cream cheese (low fat cream cheese), softened 2 oz.(60 g.) (1/2 stick), unsalted butter, softened 1 scant c. (200 g.) confectioner’s sugar, sifted 1 t. pure vanillaDirections:
Preheat oven to 350°F (180°C) . Cut parchment paper to fit two 9″ cake pans. Grease and line cake pans with parchment paper. (Or if making cupcakes, line 24 cupcake tins with paper, or grease and flour them.)
Whisk flour, baking soda, salt, cinnamon, nutmeg and ginger in medium bowl to blend. Whisk sugar and oil in large bowl until well blended. Whisk in eggs 1 at a time. Add vanilla. Add flour mixture and stir until blended. Toss carrots, walnuts and raisins with remaining 1 T. flour. Add to batter.
To make a carrot layer cake: Place oven rack in center position. Divide the batter between the prepared pans, smooth top surfaces with rubber spatula. Bake the cakes for 38- 45 minutes, or until a tester inserted into center comes out clean. Cool cakes in pans 15 minutes. Turn out onto racks. Peel off parchment paper; cool cakes completely.
For cupcakes: Fill cupcake tins until almost full. (You may have a little batter leftover if doing minis- perfect for a little personal cake baked in a ramekin!) Bake 18 to 20 minutes (13- 16 for mini cupcakes), or until inserted toothpick comes out clean. Let cool in pans for five minutes or so, then transfer to a cooling rack. Let cool completely before icing them.
Baking Times Review: for cakes: 38-45 minutes; for cupcakes: 18-20 minutes; for mini cupcakes: 13-16 minutes, or until toothpick inserted into center comes out clean.
For frosting: In a stand mixer, beat all the ingredients on medium until fluffy, about 3-5 minutes. Chill the frosting for 10 to 20 minutes, until it has set up enough to spread smoothly. To assemble a carrot layer cake, lightly frost the top of one cake, place the other cake on top. Frost the sides and top, swirling decoratively. Sprinkle toasted chopped walnuts over the top and in a ring around the bottom. For a leaner version, simply frost the top of one cake and place the second cake on top. Frost the top and leave the sides open so you can see the cake.Refrigerate the cake for 30 minutes to set up frosting.
You will probably have some leftover frosting, which you can save to shmear on graham crackers or gingersnap cookies.
Carrot Cake serves 16. OR: makes about 24 cupcakes or 48 mini cupcakes

 Happy Birthday to bb and the birthday boys and girl!
This never happens to me. But it happened last week. You know the giant pharmacies. Where everything is automated on the phone and you have to wait forever to speak with an actual pharmacist. And it’s no better live and in person. I needed my doctor’s office to renew a refill. For a common vitamin, mind you. One that’s so popular, it’s always in stock. The call was made on a Monday. I go to pick it up on Wednesday.
The clerk informs me that the doctors’ office hadn’t called it in yet. She offers me the one refill that is ready. “Why don’t you come back tomorrow for the other one?” she offers. What could it take? Five, ten minutes? The customer behind me shakes her head and says, “It’s always like this.” “Why don’t you go somewhere else?” I say to her. “It’s convenient,” she replies.
Okay. I’ll go around the store. Check out the pens and paper section, read the nutritional content of some snacks, look at the Burt’s Bees display. Very nerdy, I know, but entertaining. I return. Long line. I do another tour and pick up a few items I don’t need. I return again. This time, no line. Good. “Is it ready?” I ask. “Let me check.” Our clerk checks on her computer screen. Did I mention there were five pharmacists/pharmacy assistants standing in a line just to her left at their computers?
“No. it hasn’t been called in yet from your doctors’ office.” I pull out my cell and call my doctors’ office. “Oh, we called it in on Monday,” says the nurse. “Really! Can you tell them?” I attempt to pass the clerk my phone. “Oh, no! We can’t do that!” cries the clerk. “She has to call us directly.” I can understand that. I could have my car mechanic on the phone, for all they know.
Still patient. Minutes are ticking by. Clerk instructs me to go sit down and distractedly waves me towards a bank of chairs. No, thanks. I walk past all of her pharmacy co-workers who are standing there. At the Place Order window, I ask for the manager. “Uh, he’s not here right now,” is the reluctant response. I look down at my watch. I’ve been there for over forty minutes. “Your department tells me you never received a call from my doctors’ office. They tell me they called. They just called again. I know you stock this vitamin.” The guy behind the glass is looking down, completely disinterested. “And you’re not even giving me the dignity of eye contact. Please just go and fill this.” I feel myself speaking louder and louder. All the pharmacy people are studiously looking down at their keyboards.
“What is wrong with this place?” I’m crying now. “Haven’t you ever heard of customer service?” The guy behind the window shoves the vitamins towards me. “Take it,” he hisses. I start to get out my credit card. “No. Just take it and go.” I stare at him incredulously. “You want to buy me off for 8 lousy bucks? That’s disgusting! What kind of operation are you running?” I see a woman who I recognize as an assistant manager approaching with a large man who’s holding a walkie-talkie. Great. Now I’m going to be thrown out of this place. “Do you want some water?” asks the assistant manager. “No, I want you to take a look at this. No one is looking at the customers.” The guy behind the counter hurriedly slips the medication description under the glass. That paper, is a requirement with every prescription. He didn’t even bother to give it to me until the manager came over.
“Are you security?” I ask the big guy. “No, I’m the senior manager.” I’m starting to think they’re going to throw me out of the store. “I’m so sorry,” the assistant manager, who’s actually quite sweet, keeps repeating. “The pharmacy department is undergoing new management”. “I’m sorry for you,” I say, looking at her, “that you have to work with people like this. No one takes responsibility. No one cares. No one even bothers to look at the customers.”
I’m a mess by now – exhausted, hungry and wanting to go. Sweet assistant manager grabs a family-size box of tissues, tears it open and offers me one. “I’m so sorry,” she repeats again. “Are you sure you don’t want water?” “No, no thank you, I say,” through hiccups, “I just want to go.” “I’ll walk out with you,” she says. “Why do you work here?” I ask. “Why aren’t you at Whole Foods where you can be around people who care about their work?” “I tried,” she whispers plaintively, “they didn’t accept my application and I need this job.” I hand her back the box of tissues. “No, keep them,” she says, pushing the box back at me.
I get in my car and drive directly to Whole Foods. In the parking lot, as I get out of the car, a young employee approaches with a shopping cart. “Would you like one?” he asks with a smile. “My name’s Jeremy” and extends his hand. “If you need anything, just let me know.” Jeremy, in one small act of kindness, you just turned the whole day around.
So, I figure meltdowns require comfort food. Jeremy helped immensely. But a tuna melt(down) might work wonders right about now..
I grew up with tuna fish sandwiches. It was one of the go-to sandwiches my mom used to pack for me to take to school. Tuna salad or egg salad. My mom was a working mom and every now and then, there would be a bit of shell in the egg salad. I loved both salads, but invariably I was a bit relieved on the days that it was tuna. That surprise crunch could be a little unnerving.
Tuna melt was reserved for special occasions. An early week-end supper made by my sister for just the two of us. Sometimes ordered in diners to arrive with fries and a black & white milkshake. (If you don’t know what that bit of heaven is, it’s a milkshake made with both vanilla and chocolate ice cream and chocolate syrup. Dreamy.)
A tuna melt is something I haven’t made in ages and it’s something I so loved as a kid,. Gooey with cheese, creamy and crunchy tuna salad sandwiched between toasted bread. I don’t eat like that anymore.
But guess what? My Novio doesn’t see anything wrong with eating like that. I’ve seen him make tuna salad. Open can of tuna, drain it, add mayo. Add more mayo. Taste. Add more mayo… You get the picture.
To be completely fair, Novio informs me that it’s tuna packed in water, not oil.
 I begin, as I’ve always done, and my mom before me, with Bumblebee Solid White Tuna, packed in water (hey! Is that why I found the word ‘bumbleberry’ so appealing? hmmm…).
I grew up with (Hellman’s) Best Foods mayonnaise. I also really like this local brand, though it’s not always easy to find.
Here’s what’s healthy about this tuna salad:
Dial down the fat content. The first step in doing this is deceptively simple. Use a fork to flake the tuna as much as possible before adding the mayo. You’ll need a lot less mayo that way. Avoid adding a big gob of mayo first and mashing the heck out of it. Use a healthy, lower fat and natural mayo, if you can. Or, use the real thing sparingly.
 Ramp up the flavor content with fresh herbs and lemon. Adding lemon juice also brings down the amount of mayonnaise needed.

 Chopped celery and green onion for us.
Select a good quality whole-grain bread to use as your base. We’re going to lower the carbs, sodium and everything else by making an open-face tuna melt. In lieu of a second slice of bread, we’ll use shredded lettuce (or spinach or any type of greens) for the top. You can also use a whole Romaine lettuce leaf to top your tuna melt.

Select a low-fat cheese for melting. I like mozzarella, Jarlsberg or provolone. And poof. You’ve got tuna melt redux.

Of course, there are so many other ways to make tuna salad healthy and a bit different: add apples, nuts, red pepper, jicama, grapes. As in so many other things, let your imagination decide. In this case, we’re going for an old-fashioned tuna salad in an updated and lighter form. When my Novio tasted this, he thought it was the old-fashioned version and was totally surprised when I showed him how little mayo I’d used. He even thought there was pickle relish in there. The acidity of the lemon juice fooled him!
HEALTHY TUNA MELT(DOWN)
Ingredients:
6 oz. can solid white tuna packed in water, water drained 1 green onion, chopped 1/2 stalk celery, chopped 1 T. chopped fresh dill (or parsley or cilantro) 2 t. fresh lemon juice 2 t. great quality mayonnaise (and that’s teaspoons, not tablespoons!) 2 slices whole-grain bread 2 slices part-skim mozzarella cheese or low-fat Jarlsberg or provolone salt & pepper, if desiredDirections:
Flake tuna well with fork and add lemon juice and chopped herbs, celery and green onion (and salt & pepper, if desired – I don’t use it). Add mayo, one teaspoon at a time to your desired degree of moistness. Remember, cheese will also add moisture.
Toast bread lightly. Place half the tuna salad mixture on each slice of bread and spread. Top each half with a slice of low-fat cheese. Bake in a pre-heated toaster oven (or oven) for 5 minutes at 400 degrees, or until cheese is just melted.
Top with shredded lettuce or a Romaine lettuce leaf.
Makes 2 servings.
 Serve your favorite fresh veggies with your tuna melt. That always includes Persian cucumbers for me.
This is my tuna melt before I added lots more lettuce on top.
Next time a meltdown comes-a-calling, make a tuna melt to go with it.
It’s been hot around here lately. Not as hot as where the fires have been blazing in the San Bernardino Mountains outside of Los Angeles. That’s a bit too close to home… it’s where our niece the forester is working round the clock to help coordinate efforts and generally keep things in check. All cell phone communication is being discouraged so we only have the official website to rely on for information. The last bit of info was that the fires are almost 50% contained. We heard that my Novio’s brother let out a whoop that almost knocked him out of his chair when he read this update.
Our niece, Kayanna is a tough cookie and I know that as soon as she gets back to her place she’ll want to cook, no matter how exhausted she is. Cooking’s kind of life-affirming, you know.
So I’ll join her in her efforts. I prefer to think of my kitchen style as assembling instead of cooking. Now that we’re in warm weather and because we’re celebrating things getting under control, I want to assemble flavors that are warm but most definitely not fiery. I love to experiment with seasonings and ratios. This combo is inspired by Tunisian, Moroccan and Ethiopian cuisines, with the warm-hued reds and yellows of cumin, pepper flakes and turmeric livening up all the little taste buds.
Let’s start with a very reliable trio of onion, garlic and ginger.

Chop everything up finely.
 Saute this trio with plenty of warm seasonings, like cumin and turmeric, and add a generous squirt of tomato paste.

well-seasoned onion, garlic, and ginger with tomato paste
Yes, I said squirt. I use this tube of Italian tomato paste that I love and I’ve praised before on this site. You won’t find a little can of half-used tomato paste covered with a piece of aluminum foil in my fridge (that may or may not be acting as a Petri dish for some unsavory little critters). At least not in the last several years, you won’t.
Take this wondrous mixture and shmear, yes, I said shmear, it all over the rinsed and dried chicken pieces.
 Even though the chicken is skinless, the topping helps lock in the natural juices of the meat.

 Every forkful so moist, so flavorful…
‘FLAVORS OF THE MIDDLE EAST’ CHICKEN
Ingredients:
2 lbs. chicken breasts 2 T. olive oil 1 small onion, chopped 3 cloves garlic, minced 1-inch piece ginger, grated 1 T. turmeric 1 t. cumin 1/2 t. coriander 1/4 t. salt 1/8 t. red pepper flakes 2 T. tomato paste 2 T. chicken/vegetable broth (can use either red or white white instead)Directions:
Preheat oven to 375°F (190°C).
Wash and pat chicken breasts dry with paper towels.
Heat olive oil in saute pan. Add chopped onion and ginger and cook over medium heat until tender, about 5 minutes. Add garlic and saute a half-minute. Add all the seasonings and quickly saute for another minute.
Drop tomato paste into center of mixture and quickly incorporate it. Add broth (or wine). Saute over medium-high heat a few minutes so that you have a thick mixture.
Place chicken in a greased baking dish. Distribute mixture equally over the chicken. Using the back of a spoon, spread mixture over the tops and sides of each piece.
Bake for 25 minutes. Check to see that meat is just cooked through. Tent with foil out of the oven for a few minutes longer.
Makes 4-6 servings.

Ahhhh, peaches.
Back when I first began dialysis treatments eons ago, I was severely restricted in partaking of all things potassium. Beloved summer fruits were verboten. Dieticians went around the dialysis clinic spouting which foods were out of bounds. Compliance was demanded of everyone. Most people don’t generally react well to being treated as naughty children and there was lots of complaining going on, not to mention poor lab reports. Overly high levels of potassium is just asking for a heart attack. I began tracking my monthly lab values. If half a cup of peaches was considered a high level of potassium, why couldn’t I eat a quarter cup and have it equivalent to a low or even a moderate amount potassium? And so I figured out how to work the system. Have a small peach and stay away from other high potassium fruits or veggies for the rest of the day. And that’s how I learned to adhere to what was good for me to eat.
In other words, mindful eating. Sound somewhat familiar? Something we all aspire to…

Farmers’ Market display
These days (actually these last 11 years), I have been doing my dialysis treatments at home, 4 nights a week, 7 hours a pop. My dialysis is long, frequent and very gentle on my system. In other words, it’s as close to actual kidney function as I can get, in a very broad sense. I have my days to myself, I don’t get wiped out from this type of therapy and best of all, my lab reports are thankfully, pretty darn good.
Translate all this medical mumbo-jumbo to: I can eat peaches and all kinds of wonderful fruits and veggies!! In moderation, of course… And you wonder why I’m so frickin’ giddy about terrific fresh food.

My Food Bloggers LA group had chosen summer fruits as the food theme. I envisioned lots of crisps, cobblers and pies.

Sweet along with savory
Though a crisp was my first thought, I decided to offer up a salad with roasted fruit.
This is easily done. Select fruit that’s just ripe. Very ripe fruit will still be delicious but bit mushy. Cut in half and twist halves back and forth until they pull apart. Place flesh side down to roast.


peachy peach
That’s all there is to it. By the way, roasted peaches are insanely good with vanilla ice cream and maybe a few chocolate chips sprinkled over or a bit of Grand Marnier. But I digress. Back to our delicious salad.
I used arugula and romaine along with mache, a lettuce that’s sweet with a bit of crisp. I’ve found it at farmers’ markets and recently saw Organicgirl at Camp Blogaway and now at my Whole Foods. (Mache is at other markets too.)


 I developed this salad by free associating with peaches in mind. Peach crisps are terrific with a crunchy pecan topping. Knew I needed to toast some pecans.
 I wanted a light dressing that would add a touch of sweet and a touch of savory. White balsamic vinegar, with a bit of olive oil, maple syrup and stone ground Dijon mustard to bring it all together, was just the thing.

Remember Peach Melba? Peaches, raspberries and vanilla ice cream? Now there’s an excellent combo! Thought I’d throw in a bunch of raspberries into my roasted peach salad. I’m getting excited.
Roasted Peach and Goat Cheese Salad
Ingredients:
4 fresh peaches, just barely ripe (preferably from your local farmers’ market) 6 oz. (about 180 g) mixed lettuces (I used a mix of romaine, mache and arugula) (See NOTE at end of ingredients) 2 Persian cucumbers, halved lengthwise and thinly sliced 2 green onions, thinly sliced 1/2 pint of raspberries 6 T. white balsamic vinegar 4 T. extra virgin olive oil 1 T. maple syrup 2 t. whole grain Dijon mustard salt & pepper few pinches red pepper flakes 1/2 c. pecan halves, toasted, left whole or roughly chopped 2 oz.. goat cheese, crumbled 2 T. fresh mint leaves, roughly chopped NOTE: Honestly, I don’t ever measure lettuce, I just throw in a few handfuls per serving. I suggest you do the same, if you don’t already.Directions:
Preheat oven to 400°F. Wash and thoroughly dry peaches. Cut in half and gently twist back and forth until peach loosens from pit. Don’t squeeze the peaches too hard – you want to keep as much juice as possible inside the peaches. Roast peaches, cut side down until juices are bubbling and darkening, about 20-25 minutes. Cool and cut into bite-sized chunks.
Toast pecans in a hot dry skillet over medium heat for about 3 minutes, until fragrant. Pecans burn easily so stay right there.
Whisk together vinegar, oil, maple syrup and mustard. Add salt & pepper and red pepper flakes. Or shake dressing up in a glass jar.
Place lettuces, along with green onions and cucumbers in salad bowl. Toss with half the dressing. Add cut up roasted peaches and raspberries and toss very gently. Add pecans, mint and crumbled goat cheese over top. Taste and pour desired amount of remaining dressing over top.
Makes 4-6 generous servings.
Note: Omit the cheese and it’s dairy-free.
 Happy peachy eatin’
Okay, 4th of July is around the corner. Take 2: We are officially around the corner from July 4th.
My novio’s brother and sister-in-law were in from Beaverton, Oregon and we had time to hang out and eat and talk and just BE, together. Then we went to my sister’s house for a late July 4th barbeque celebration and an early Shabbat celebration. I always take a weekend respite from everyday life on Saturdays. And, time with dear dear friends (really family) on Friday and Saturday. Plus on Sunday, my mom, my Novio and I had a beautiful time at the Brentwood Farmers’ Market, followed by a late lunch using lots of the delicious finds at the market. Everyone pitched in… I set it up, Novio made the eggs, my mom sauteed the mushrooms. A wonderful relaxing late lunch (linner? lupper?) was had by all. Yes, I wanted to get this post out last week. But needed to make time for loved ones. Thank you. I knew you’d understand. Family first.
And now back to our scheduled program…
Want to make a side that’s a bit different than the mainstream pasta or macaroni salad? Try using Israeli couscous! These little round pasta balls are a really pleasing shape. My mom is currently having a love affair with both Israeli couscous and quinoa. Every time I make either one, she asks, “What’s the name of this again? I really like it!” My Novio tends to say the same thing…
You can increase the flavor quotient by toasting the couscous in a tablespoon of olive oil before adding the broth/water.

Our niece Kayanna is an awesome cook. Her knife skills alone are like performance art to me. When we had friends over for dinner and Kayanna was there helping, she looked up from mincing garlic while we stood around her, mesmerized and said, “I didn’t know this was so impressive… should I get a few more cloves?” “Please, please!” we all exclaimed in unison.
Kayanna spent a year in China plus is familiar with a wide range of cuisines from around the world. I am feeling her influence because chopped fresh mint is appearing in a lot of my dishes lately.
 And I can’t make a salad without a generous amount of green onion thrown in.
 Over Memorial Day, my Novio and I went to a really cool event for food bloggers, called Camp Blogaway, in the mountains two hours from Los Angeles. It was so great to be part of the seminars & workshops and to meet the sponsors. But most of all, it was terrific meeting people with the same passion for all things food and getting to know one another. Thank you, food blogger Patti Londre, for being the visionary behind this event and making it a reality. We had a blast!

One unusual product was Finger Limes from Shanley Farms (I didn’t get strong-armed to post this -just thought it was a really cool product and would work well in this dish- it did).
 If you find them in the specialty produce section of your market, go ahead and try them. They’re very fun. Cut them in half and squeeze out the little translucent balls that look like fish roe. Each little ball has a tiny squirt of lime juice waiting for you when you bite into it. A delightful surprise scattered through your salad. Admittedly, the finger limes I used were a bit off-color. But I wasn’t dissuaded. Don’t judge a book/lime by its cover.

 Zest the lemon, then juice it. Soak sun-dried tomatoes to plump them a bit.
 The salad contains no dairy or mayonnaise, so it’s perfect for a picnic. But you certainly don’t have to wait for a picnic to try this winner of a salad. As always, experiment with your favorite veggies, raw or roasted, diced into this salad. It’s very flexible.

Israeli Couscous Salad
Ingredients: 1 c. Israeli couscous (regular or whole wheat) 1 1/2 c. broth/water (I use half broth and half water) (or, amount of liquid according to package directions) 1 c. roasted corn kernels (from roasted corn, grilled corn or frozen) 1 T. fresh mint, chopped 2 green onions (scallions), thinly sliced 1 T. sun-dried tomato, soaked in hot water for 15 minutes, then roughly chopped zest of a small lemon 2 T. lemon juice 2 T. olive oil salt & pepper 4 finger limes, if available (if not, use juice of half a lime)Directions:
Toast the couscous in a saucepan with a spoon of hot oil on medium heat until it begins to get fragrant, about 3-5 minutes. Add liquid (a combo of broth and water), bring to a boil, lower heat to med-low and cook with lid askew until liquid is almost absorbed, about 5-7 minutes.
Remove from heat, cover and let sit for 5 minutes until all liquid is absorbed.
Meanwhile, soak sun-dried tomatoes in water. Zest and juice a lemon, and chop mint. If using finger limes, cut in half and squeeze out the pear-shaped pulp.Otherwise, juice half a lime.
If using fresh corn, either roast or grill one large ear. For roasting, lightly brush corn with olive oil and a bit of salt and roast in 375°F (190°C)) oven for 12-15 minutes, or until tender when pierced with a fork.
Toss warm couscous with lemon juice and oliv oil. Add all other ingredients, except mint and adjust salt and pepper to taste.
Just before serving, toss again and add chopped mint. Now that looks summery!
Serves 4-6.

DISCLAIMER: This post is unlike my others. I went out on a limb and onto a baking adventure. I invite interested readers to send me comments/suggestions in what I’ll call a baking workshop.
I, like legions of other food lovers, enjoy Deb Perelman’s Smitten Kitchen food blog. A few months ago, she posted a Bee Sting Cake. It’s a favorite of her mom’s and harkens back to her German-Jewish roots. Bee sting cake or Bieninstch is one of the most popular cakes in Germany. When she posted it, it drew a huge response from all over the world. Not only because of Deb’s memories of going to the Yorkville section of Manhattan with her mom when she was little and visiting the German Konditoris (pastry shops and cafes), but also for her terrific determination in baking several bee sting cakes throughout the week to get it just right! What a delicious science project!
For me, it immediately took me back to going to the eye doctor with my mom in the Upper East Side of Manhattan when I was a little girl. He would try lens after lens to check my astigmatism, saying, in his thick German accent, “Iz deez bet-tair? (read: Is this better?) Or iz deez bet-tair?” He would confuse and entertain me at the same time. I eventually responded, emphatically saying, “Deez iz bet-tair!”
My mom’s 9oth birthday is here (Yes!) and so I’m doing lots of things in the kitchen with her in mind. Bieninstich is essentially a tender, yeast-based slightly-sweetened cake, split in half with pastry cream in the center with a cooked honey-almond-caramel crunch topping. Wow. My hat goes off to Deb for her grand finale after several tries.
This was my first attempt so I approached it with realistic optimism. Good thing. As a good friend always says, “There are no mistakes. Just learning opportunities.” Well, this was quite the opportunity.

The cake calls for instant yeast, instead of active dry yeast. Instant yeast is also sold as bread machine yeast or rapid rise yeast. The yeast may have been instant but I can’t say the same for our lovely cake.


studying the recipe
Cake seemed okay as it headed to the oven…

…but I was concerned about the honey-almond crunch topping. In my excitement, I was probably too hasty. The almonds weren’t brown enough. And I should have figured it out when the topping was on the runny side and Deb had described placing the topping in clumps on the cake. There were no clumps of topping (unfortunately, there were plenty of clumps in the custard). When we (yes, we – no way was I attempting this project without support standing by) flipped the cake, that baby couldn’t take the handling and broke up (I can relate, having had personal experience in the Handle with Care Department).

How do I split this crumbly baby?
And now the custard issue. I adore custard. I just don’t have experience making it. Probably because I don’t really want to know how much egg/milk/sugar it has in it.
I figured flour and cornstarch are perhaps not exactly interchangeable. So I used 2 tablespoons of cornstarch in lieu of 3 tablespoons of flour. I didn’t get the floury taste. It tasted fine. But the consistency? I got nuggets. Yes, nuggets. My gut was saying, “This looks like a lot of cornstarch.” Thank you, gut. I should have listened to you. Half the cornstarch to replace flour? Experienced bakers, please advise!!

gloopy custard atop falling-apart cake
May not be picture-perfect but it tasted delicious. And definitely best eaten the day it’s baked. A tough one for me, because when I have people over, I like to do as much preparation ahead of time as possible. In any case, I’m baking this baby again.

What follows is the recipe that I pass along to you directly from Deb Perelman’s Smitten Kitchen. Click here to view her beautiful images of what her gorgeous cake looked like and to read all her notes. Her detailed play-by-play and her images are terrific! My slight changes are in parentheses in the recipe.
BEE STING (BIENINSTICH) CAKE
Cake Ingredients:
2 1/4 t. (or 1 1/4-ounce package) instant yeast (not active dry) (also sold as rapid rise or bread machine yeast)
3/4 c. whole milk, at room temperature (I used low-fat milk)
1/4 c. granulated sugar
2 c. all-purpose flour
3/4 t. salt
2 large eggs, at room temperature
4 T. unsalted butter, at room temperature
Honey-Almond-Crunch Topping:
6 T. unsalted butter, cold is fine
1/3 c. granulated sugar (I used 1/4 c. sugar)
3 T. honey
2 T. heavy cream (I used half & half – did that alter the caramelization process?)
1 1/2 c. (4 3/4 oz.) sliced almonds
Two pinches of sea salt
Pastry Cream Filling:
1 c. whole milk
Seeds from 1/4 to 1/2 vanilla bean, 1 t. pure vanilla extract OR 1/4 t. almond extract (I used almond extract)
3 large egg yolks
1/4 c. granulated sugar
3 T. all-purpose flour or cornstarch ( I used 2 T. cornstarch and it was too much… maybe 1 1/2 T??)
2 pinches sea salt
2 T. unsalted butter, cold is fine
For the cake: Combine all of the cake ingredients in a medium-sized bowl, stirring till the mixture comes together, then stirring for two minutes more. Or use a stand mixer, at low-medium speed for 2 to 3 minutes. Scrape down sides, cover with plastic wrap and let rise in a draft-free place for 60 minutes, till it’s a little puffy. (It won’t fully double; this is fine.)
Butter a 9-inch round cake pan. Stir the batter a few times to deflate it slightly, then scrape it into the prepared pan with spatula and spread it until it fills the bottom. Cover again with plastic wrap (don’t let it drape in and touch the top) and set aside for another 30 minutes.
Meanwhile, make the honey-almond-crunch topping: In a small/medium saucepan over medium heat, heat the butter, sugar, honey, cream and salt until the butter is melted. Bring to a simmer and let it boil for 3 to 5 minutes, until the mixture becomes a shade darker (it should go from a yellowish tone to a light beige), stirring frequently. Stir in the almonds. Set it aside to cool slightly.
Heat oven to 350°F.
Once the cake has finished its second rise, use a small spoon to scoop out small amounts of the almond topping and distribute it over the top of the cake. It’s going to be a little challenging because it is firm, but I promise, even if it’s not perfectly evenly distributed, it will all smooth out beautifully in the oven. (This didn’t quite happen in my attempt.)
Bake cake on a foil-lined tray to catch any caramel drips, for 20 to 25 minutes, until top is bronzed and toothpick inserted into the center comes out batter-free. Transfer to a cooling rack and let it sit in the pan for 10 minutes. After 10 minutes, run a knife along the outside of the cake, making sure no places are stuck and invert the cake onto the cooling rack. Reverse it back onto another rack to finish cooling, replacing any almonds that fell off right back on top. They’ll merge back with the caramel as it cools.
Make pastry cream: Warm milk and vanilla bean scrapings (if using; if using an extract, don’t add yet) in a medium saucepan. Pour into a small bowl or cup, ideally with a spout. Set aside. Rinse saucepan with cool water, to rinse and cool; wipe to dry. Off the heat, whisk the yolks and sugar vigorously together for a minute, until pale and ribbony. Whisk in flour and salt until smooth. Drizzle in warm milk mixture, a spoonful at a time, whisking the whole time. Once you’ve added half of it, you can add the rest in a more steady stream, again whisking the whole time. Return the saucepan to the stove and cook on medium-high heat until it bubbles, then simmer for two minutes, whisking the whole time. Off the heat, whisk in the butter and any extracts you may be using. Cool custard completely before using, a process that can be sped up in the fridge or whisking it over a bowl over ice water.
Finally, assemble the cake: Once both the cake and pastry cream are fully cooled, place the cake on a serving platter and divide it horizontally into two layers with a long serrated knife. Spread pastry cream over bottom half. Place top half on pastry cream. (Note to self: Must try this whole process again to improve on technique.) Serve in wedges; watch out for bees. (Check out the Smitten Kitchen post for possible explanations on the Bee Sting name.) Refrigerate any leftovers.
Now go for it and good luck!!
My mom loves mushrooms. Have I mentioned it’s my mom’s birthday month? Her 90th? I believe I have. In tribute to her and for her, I’m making a lot of her favorites this month. That’s also the reason you haven’t heard much from the bumbleberry kitchen lately. I will make it up to you.

A noodle kugel, that’s the ticket. Sweet or savory, she loves them all. So long as they have flavor, they don’t come out dry and have a nice crunch on top. And be sure to give her a corner. A woman after my own heart.
 I used wide egg noodles. If I found curly egg noodles, I would have bought those instead. But I didn’t have time to go to another store. I had to hurry home and get that kugel in the oven.
When I told my mom, I’d be browning onions and adding mushrooms, she exclaimed in German, “Ein GEMÜSE (a vegetable) Kugel?!” She may be 90 but the little girl who delights easily is still there inside. And when she gets excited, she mixes German into her English. Both she and my dad grew up in Northern Rumania, that part that belonged to the Austrio-Hugarian Empire before WWI. So they spoke German as well as Rumanian at home. And because my mom has an incredible ear for languages, she speaks eight more languages well. Yes, you read that right, she speaks ten languages.

sauteing chopped onions

browned onions to mix with noodles

we love mushrooms
Thought I’d throw in some broccoli, you know, and up the nutritional content.

After noodles and egg mixture are mixed with the cooled onions, part of the mix gets spread in my trusty Pyrex baking dish.

In the middle, I place the veggie mixture. I like layers but sometimes I mix everything up and bake it with the good stuff throughout.

spread last of the noodles on top
Once the kugel is assembled, you can bake it as is. Or you can drizzle a bit of oil on top. Or you can go an extra few yards and throw on some bread crumbs or Panko (Japanese style bread crumbs – love them) or if you happen to have some end-of-the-box corn flakes lying around…

Rolling, rolling, rolling on the cornflakes! Working on a kugel every night and day…
I had fun with that French rolling pin of mine. Regular rolling pins work fine. A wine bottle is good too.
 ready for oven

Want a piece?
BROCCOLI MUSHROOM NOODLE KUGEL
Ingredients: 10 oz. (280 g.) package egg noodles, medium or wide, if you can get curly, even better (if package is slightly larger, it’s fine) 6 T. canola or grapeseed oil, divided 3 eggs 1 large onion, chopped 3/4 lb. (300 g.) mushrooms, thinly sliced 2 cloves garlic, chopped 1 lb. (450 g.) broccoli, fresh or frozen, cut in pieces (if frozen, can be pieces or chopped) 3 T. Italian parsley, chopped salt & pepper Topping: 1/2 cup corn flakes, crushed (Trader Joe’s brand of corn flakes has nice crunch with less sugar) 2 teaspoons oil 1/2 teaspoon sweet Hungarian paprikabb note: There are differing schools of thought on the best noodle for a kugel. There’s a consensus that egg noodles are the best for kugels. Some use wide (also called broad) egg noodles. Others like medium. Curly egg noodles are sometimes used. My mom likes curlies. So there.
Directions:
Cook noodles according to package directions. Generally, that means cooking the noodles in rapidly boiling salted water in a large uncovered pot for the number of minutes specified. It’s a good idea to turn the heat down to low when putting in the noodles so the water doesn’t bubble over. Remember to put the heat back up to high. Drain noodles in colander.
Preheat oven to 350° F (180°).
Heat large saute pan. Add 2 tablespoons oil and heat until oil begins to shimmer. Add chopped onions, and saute, stirring every now and then, for about 10 minutes, or until onions begin to brown. Transfer onions to bowl or plate to cool.
In the same saute pan, add another tablespoon of oil to heat. Add mushrooms and quickly saute with salt and pepper until mushroom liquid begins to run, about 3-4 minutes. Add chopped garlic and cook for another half-minute.
Steam or cook broccoli in a small amount of boiling water for 5 minutes. Drain and roughly chop (if not already chopped). Add broccoli and chopped parsley to mushrooms and toss. Set aside.
Beat eggs in a large bowl with 3 tablespoons oil. Mix cooled onions in and add salt and pepper. Stir in noodles and mix until noodles are thoroughly coated with egg mixture.
Place a little more than half the noodle-onion mixture in a greased 9×13 (large) baking dish. Spread noodles with the back of a large spoon or spatula. Add mushroom-broccoli mixture and spread veggie layer over noodles. Add remaining noodles to cover.
Here comes a fun part: Get out a rolling pin and crush corn flakes in plastic bag. I waited until there were only a bit of corn flakes left in the box and sequestered the corn flakes for kugel-making purposes. If you don’t have a rolling pin, a wine bottle will work well, too.
Sprinkle crumbs over the top of kugel. Drizzle 2 teaspoons of oil over the top and sprinkle with paprika.
Bake for 45 minutes or until kugel feels firm on top and is browned around the edges.
Makes about 12 good-sized pieces.

I didn’t always have the good relationship that I have today with Brussels sprouts. I either undercooked them or overcooked them. And they seemed too have a somewhat bitter taste. What did I know? I certainly didn’t know about roasting them back then. I had the working mom-canned veggie syndrome that I had to flush from my system. No hard feelings, Mom. This is your birthday month, after all. And your 90th, no less! Which is partly why I’ve been off the radar… there’s a party to plan!
I always liked the look of Brussels sprouts, though. There was a small photograph that I had picked up at a crafts show that hung in my kitchen. It was of a large head of cut green cabbage next to a standing box grater. Spilling out of the box grater were a bunch of whole Brussels sprouts. Mini cabbage heads! The image tickled me then and still does.
Of course, roasting has the same wonderful caramelizing effect on Brussels sprouts that it does with all vegetables.

Most often, I simply toss halved Brussels sprouts in a roasting pan or a ziploc bag with olive oil, salt, pepper and possibly some garlic. Roast until tender and browned. My Novio loves to eat any charred leaves that are left in the pan.


When I want to dress it up a bit more, I zest a lemon, mix with lemon juice and olive oil and add salt and pepper. Walnut oil is an excellent choice instead of olive oil. This dressing is drizzled over the warm vegetables. Toasted walnuts are sprinkled over the top.

Playing dress-up
ROASTED BRUSSELS SPROUTS WITH LEMON AND WALNUTS
Ingredients:
2 lbs. (1 kg.) Brussels sprouts 3 T. olive oil 1/2 t. salt 1/4 t. pepper 1/2 t. garlic powder zest of 1 lemon juice of 1/2 lemon 1 T. olive oil or walnut oil 1/4 c. (50 g.) walnuts, toasted and choppedDirections:
Preheat oven to 400°F (200°C).
Wash Brussels sprouts and pat well to dry.
Cut the veggies in half lengthwise.
Toss with olive oil, salt, pepper and garlic powder.
Lay flat, cut-side down in a foil-lined pan (I use my trusty 1/2 sheet pan). Roast for 15 minutes. Toss and roast for another 10 minutes or until fork-tender and browned. Place in serving dish.
Mix together the lemon zest, lemon juice, olive oil and a little salt and pepper. Pour over warm Brussels sprouts.
Toast the walnuts in a heated, dry skillet for 2-3 minutes over medium heat or just until aromatic. Sprinkle over vegetables.
Serves 4-6 as a side dish.
bb note: Walnut oil keeps well in the refrigerator (as do other nut oils).

The word is out that I love to bake. And frankly, it definitely works to my advantage. When calling to schedule any type of medical appointment or ordering supplies of any kind, it’s a very common thing to be stuck in Hades Hold listening to painful music designed to tame the potential raging beast in you (too bad it usually has the opposite effect). Bringing an unexpected plate of homemade fudgy brownies or chocolate chip cookies to local places can do wonders for putting yourself up on the radar. Smacks a bit of bribery? Hmmm… maybe. But only of the gentlest, most harmless and delicious type.
And it works. The last batch of brownies delivered to the bureaucracy-beleagured dialysis clinic was very well-received. It even had Fred, the stockperson, confide quietly to me, “The brownies were great, but you know what I really love? Lemon Bars!”
Fred’s a nice guy, so I thought I’d surprise him the next time. I called to schedule an appointment. “Will Fred be in tomorrow?” “Er, no,” stammered the receptionist, “he no longer works for ——.” In true corporate style, we’ll never know why or where he went. I wonder if his secret request was overheard. Well Fred, wherever you are, I hope you get someone to make you lemon bars. Maybe these.

tree-picked lemons
Using the food processor is the easiest way to make the lemon bar crust.


Set up two-way parchment paper in pan (see recipe) to avoid headaches later.
 No Kneed to Knead
Simply press dough into pan with fingers.

 In Parchment Paper We Trust
One Giant Lemon Bar Out of the Baking Dish – Hurray!
 Bite-sized lemon bars
 Ever-so-slightly larger mini lemon bars
Cut these lemon bars up small – vary the sizes if you like, to make mini bars or bite-sized bars. When you’ve got a rich dessert like this, a little bit goes a long way. Serving them in paper cupcake liners keeps things tidy and encourages single helpings. Okay, not so sure about the second part.

Mini Lemon Bars
slightly adapted from Christopher Kimball’s The Dessert Bible
Ingredients:
Crust:
1 3/4 c. (400 g.) flour 1/3 c. (80 g.) confectioner’s sugar 3/4 t. salt 12 T. (1 1/2 sticks) (180 g.) unsalted butter, cool, cut into small piecesLemon Curd:
4 large eggs, lightly beaten 1 c. (220 g.) sugar 2 t. lemon zest 3 T. flour pinch of salt 2/3 c. (160 ml.) lemon juice (from 2 or 3 lemons), strained 1/4 c. milk (60 ml.) (I used low-fat) 2 T. unsalted butter, melted and slightly cooledDirections:
To prepare the crust, lightly grease (with spray or a tiny bit of butter) the bottom of a 9″ by 13″ baking dish and line with a sheet of parchment paper long enough to go up and over the sides of the long side of the dish. Lightly grease the paper and line with a second sheet of paper, long enough to go up and over the sides of the short side of the dish. This help you get the bars out in one piece later on for cutting.
Get out that food processor. Pulse flour, sugar and salt in the food processor fitted with steel blade. To keep the butter from getting too warm, cut it in little pieces first and chill for a few minutes. Add butter and process for 10 seconds and then pulse a few times until the mixture is pale yellow and looks like coarse meal.
Sprinkle mixture into prepared pan and press firmly with your fingers all over the bottom in an even layer and about a half-inch up the sides. The dough is very soft and it’s fine if it’s not uniform up the sides. It will look fine after baking.
Refrigerate for 30 minutes. Preheat oven to 350°F (180°C). Bake crust 20-25 minutes, until light golden brown.
For the lemon filling, whisk eggs, sugar and zest in a medium bowl. Whisk in flour and salt. Stir in lemon juice, milk and slightly cooled melted butter to blend well.
Reduce the oven temperature to 325°F (165°C). Stir filling one more top and pour into hot crust. Bake until filling begins to feel firm when touched lightly, about 20 minutes. Don’t overbake, filling hardens quickly.
Transfer pan to cooling rack and cool for 30 minutes. Pull on the long sides of the parchment paper (this is where the advance planning works for you) to remove entire bar from the pan in one piece. Place on cutting board or counter.
Cut into mini squares, about 32-40 pieces. Serve in paper muffin cups for easy handling. Each piece should deliver a couple of bites, perfect for this rich and scrumptious dessert.


